Wednesday, April 20, 2011

WOYWW #9 (98) - Beautiful Girl

Happy Wednesday! My ninth What's On Your Work desk Wednesday post...it's #98 for Julia! In just a few short weeks it will be WOYWW's anniversary and we're celebrating in a Pay It Forward kind of way. {Watch for post (104)}Want to know more about WOYWW or what's coming up? Check it out HERE.

(Looking for more info on my postcards? 2011 iHanna Postcard post coming tomorrow!)

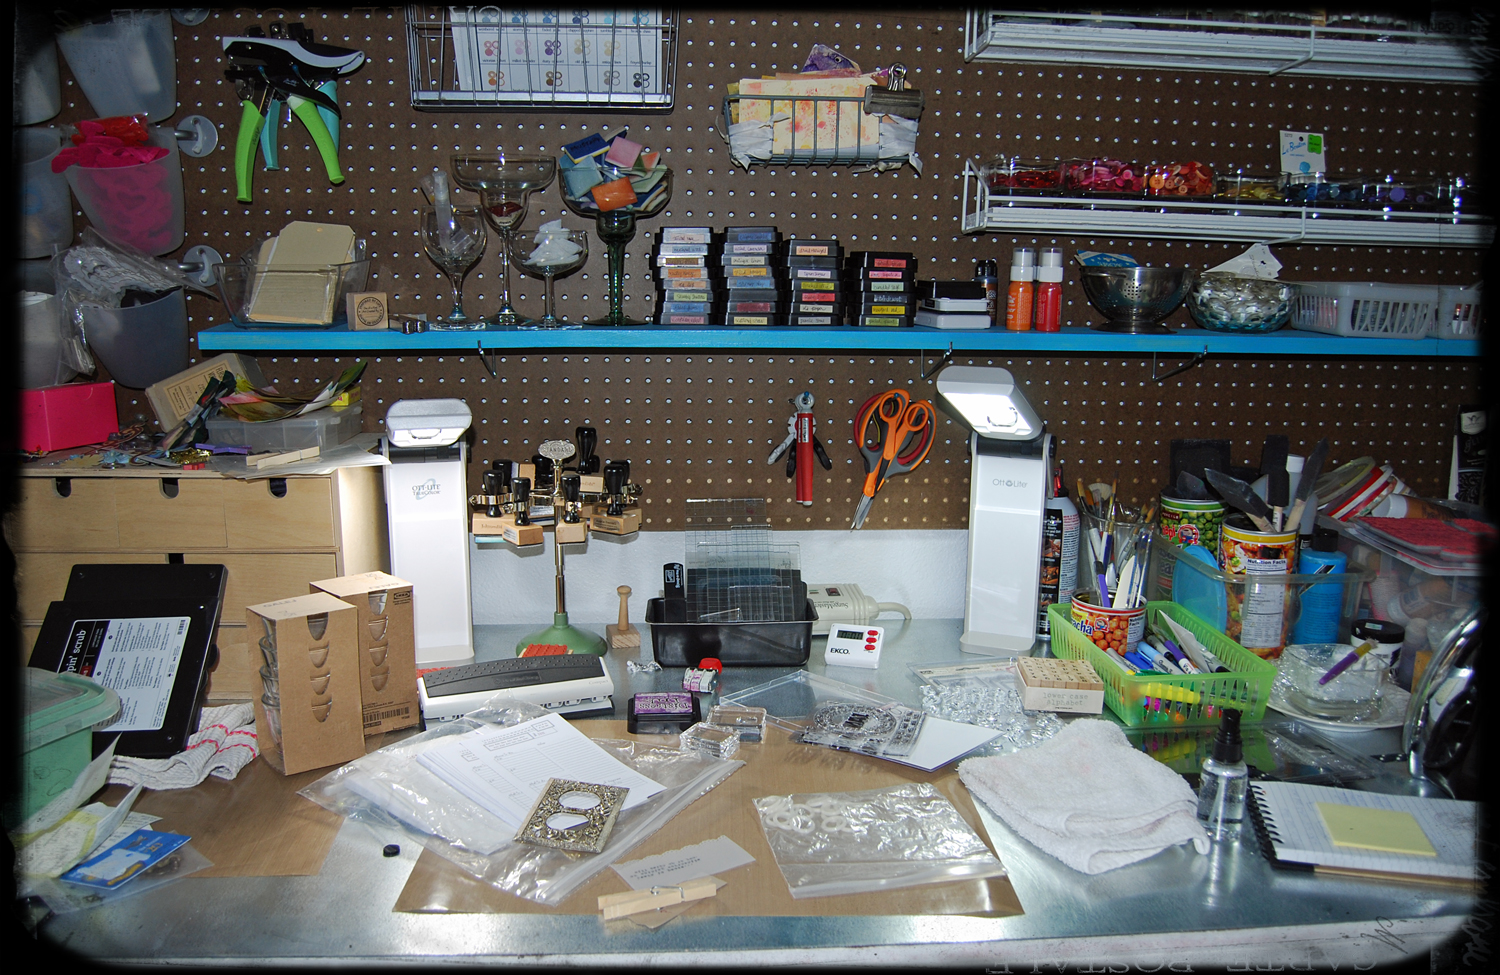
This past weekend was the deadline for Simple Pleasures April Card Exchange. The theme was "Cards for Her" and this is what my desk looked like while I was putting my cards together...


Funny...just noticed that I have the cards in various states of progress. (Often times I take a photo and it's not until I'm ready to post or print it that I notice specific details...do you do this, too?) Here's a few detail shots...


Isn't she lovely? I stamped her in Black Soot (Distress Ink) and embossed her with clear powder. Distressed the edges first and then using the blending tool inked up the edges in Vintage Photo (DI). Simple Pleasures has an event called Trash 'n Treasure several times a year. Basically, it's a flea market of crafting goodness in the store. I found her there. LOVE her. There's something about this stamp that's a bit mysterious, lending itself to many ideas...thoughtfulness, dreams, tragedy, calm...


And then the sentiment. Lots of Vintage Photo distress inking going on with this card! To darken the edges quickly, I dragged the edges on the pad.


One of my favorite "new" texture techniques...using plastic wrap with colorwashes and glimmer mists. (more on this later.) Had to include that detail shot as you can't see the glimmer in the photo below. (Card base is manilla cardstock; edges are inked in Vintage Photo.)
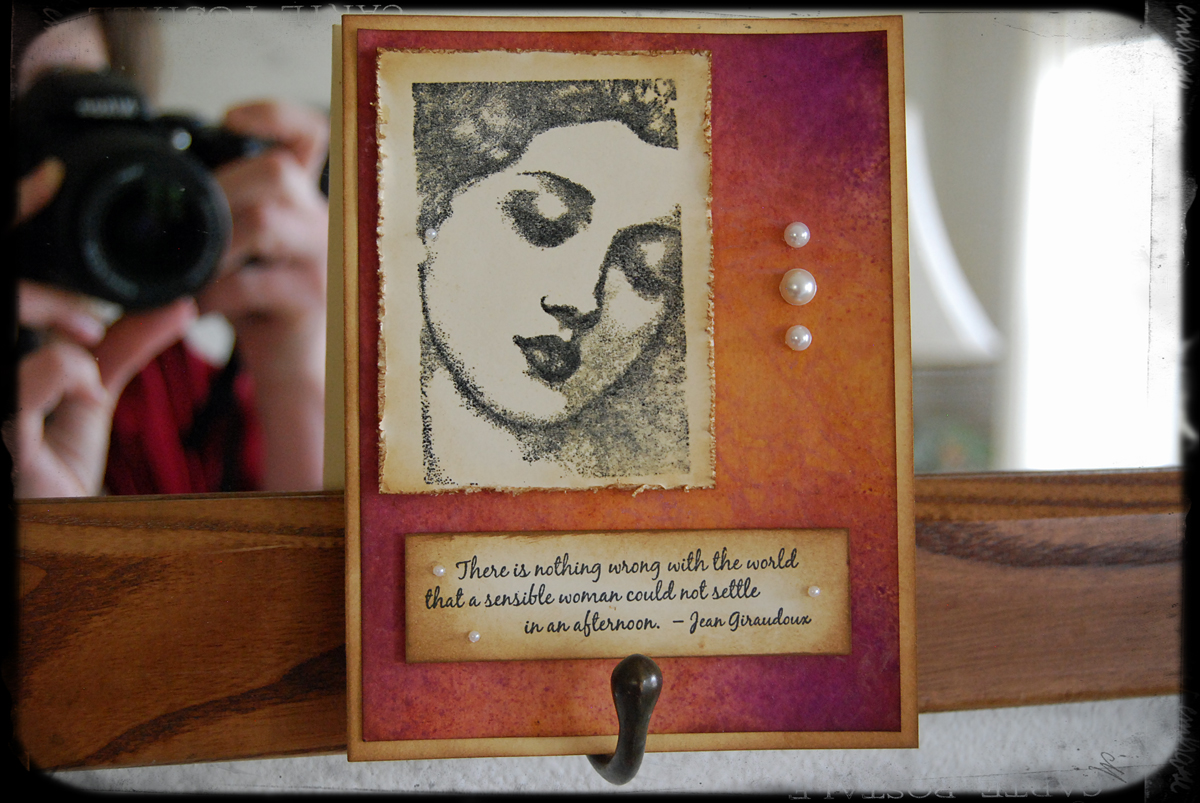

In person, the shimmer on this card is just enough. At first, I thought some ribbon was needed, but after all was said and done, I really liked how this one turned out. What do you think?

Thanks for spending part of your day with me! Would love to see what you're up to, so leave me a comment, so I can visit you!

Inky hugs,
Angi

(If you're reading this post on Facebook, please visit my blog http://makingmayhem.blogspot.com to leave a comment!)

Wednesday, April 13, 2011

WOYWW #8 (97)

Yes - 3 weeks in a row! Welcome to another edition of What's On Your Work desk Wednesday! Where we get to be a little voyeuristic and peek into someone else's creative haven. Want to know more? Check out the Queen of Sharing - Julia Dunnit - and join in the fun!

I've been really busy, but wanted to make sure to get my post up on time. Prepping for my upcoming classes, helping the kids finish science projects, history projects, end of the year stuff...busy.

But not too busy to want to share my finished postcards and even a couple I've received! So, to start off here's my work desk...


If you've seen some of the older photos you'll notice that I've done a little rearranging. That blue shelf was made for me by The Big Guy when he built my punch shelves with the kids (thought I had posted a picture...guess not...maybe next WOYWW!) I've been wanting to move my Distress Inks and some things I use often to a place that was easily accessible and easy to put away. I'm really a bit of a piler/clear container kind of gal. Notice the glasses with the foam & felt? the one with my mini misters? the one with misc. ephemera? and what about my buttons? You get the idea...the other day I had been cleaning out one of my shrunks and found some French jelly jars...pulled those out and put them on a shelf. Will be filling those soon, too!

Pretty random stuff on the desk...needed to finish my planner pages for the next couple of months, so they are on the desktop, along with some IKEA votive holders (glass, of course! The IKEA in Denver is supposed to open this fall...woohoo! These ones are from Koln...)

I know some of you have been waiting to see the postcards. I have to finish processing my pictures, but here's one I received from Stephanie in New York.


She says, " ...This postcard began as a photo, which I took of the Empire State Building. I was driving home from work and was stuck in traffic on 34th St. near Macy's..."

Love that this postcard came with a story! Thanks, Stephanie A.

My second postcard has made quite the trip...all the way from the Netherlands! Isn't she pretty? This one is from Deezy. You can find her HERE.  She's busy!

I couldn't believe that the postcard had come with the ribbon on the front. Wondered how that went at the post office...


I did find out...when I went to mail my cards I learned a few things about mailing stuff. When I designed my cards, I was worried that they wouldn't mail it without an envelope if they were too thick or heavy. (What would be the point of that? I wanted my postcards to weather the process and look traveled!) Well, if it weighs too much or is too thick you are not required to put it in an envelope, but they will charge you as if it were an unusual sized letter. Most of my postcards cost a little over a dollar to send.

While I would love to show how I finished up my postcards it's almost 0100 here. That will have to wait for another post.

Thanks for stopping by!

Inky hugs,
Angi

Wednesday, April 6, 2011

WOYWW #7 (96) - Postcards, Puppies & Static

Yikes! It's already WOYWW again...sigh. I look forward to Wednesdays, even if I'm not able to get a post out. Why?

1. What's On Your Work desk Wednesday
(Stop by Julia's to see what this fuss is about...it's great fun and inspiration!)

2. It's not Monday.
There's just something about the first day getting back into the schedule that takes a little more oomph! to get that momentum going for the week.

3. It's Hump Day.
We're almost 1/2 way through the week. That puts us closer to the weekend. Obvious, I know. I really enjoy hanging out with my family.

Since I'm talking about family...here's an update of the puppy...he had The Surgery and is wearing The Cone of Shame also know as the Puppy Handle (as in "Grab him!" as he escapes the kitchen) or the "Can We Take the Stupid Collar Off?!" when he runs into you from behind, bumps the back of your leg and then clotheslines you as he attempts to apologize with kisses.


Don't you just love the 'electric puppy' look? It's bad enough when he runs into you, but it's downright funny to see him run into someone else & zap them! It's been a tough week for the puppy. We've got the bruises and scrapes to prove it!

Okay...on to the work desk pictures! I'm finishing up my Postcard Swap. Nothing like creating under pressure! If you want to see where I began, click HERE.

The desk...yes, I create in the middle of mayhem...almost always. I like having everything nearby and available. I try to do a quick clean up and a little reorganizing the night before I craft. (Most of the time I have to schedule in the play time.) Next upgrade to the studio will be a double sink & drainboard!


Still wearing gesso and ink on my fingers. My paper towels and baby wipes (I will one day post about how I upcycle those...), my postcards, a canvas I started (itching to get to that), a gift I'm working on...always something to do.

Here's a sneak peek at a few of the unfinished postcards...I'll post more about my process later this week.


As I was sitting here reading over the post, I see that my ink and dip pen are in the picture...before anyone asks...no, I did not write the script on the postcards! I have Tim Holtz to thank for that! It's one of the stamps from...okay...I thought I'd share the name of the set, but I can't find it on the desk! LOL

I think it's the Papillon set...the one with the butterflies...

Thanks for stopping by today!

Inky hugs,
Angi

Tuesday, April 5, 2011

New Adventure - Soul Restoration


This particular fortune rang true today! Today is the official start of Soul Restoration at The Brave Girls Club.

Feeling stuck? Wondering where your fun, life loving self has gone? Disconnected?

Me, too. So, I decided it was time to do something about it! I'm pretty nervous, wondering what and who I will find, but I'm excited, too! It's a community of people in the same place, working on learning the "...art of soul crafting..."

So, this is me, calling you. Sharing the good news!

It's not too late to register! You can do so at any time, during this session...if you do, look me up, so we can travel this road together. (Road trips are always better with friends!)

Inky hugs,
Angi

Friday, April 1, 2011

Postcard Swap [1]: In the Beginning - Base Layer

{Here's what I wanted to post for WOYWW #6 (95), but didn't have time to do! }

I have been debating whether or not to share the process of creating my postcards. This is my first postcard swap. Heck, these are my first altered postcards (not counting the recycled junk mail from my childhood...) and I have been overwhelmed with the wonderful posts and pictures I've already seen!

But...I really appreciate seeing how others get from start to finish...especially when they share what they've learned along the way. So, for good or bad...I'm sharing.

When I first thought about the swap, I wondered where I was going to find postcards to alter. It never occurred to me to just cut my own out of cardstock. I have a pretty sizable stash of alterable items, but I didn't remember keeping any postcards. I'm also in the middle of reorganizing my studio (I moved it in December) and figured if I did a little bit of picking up something might come to me. I moved piles of papers, boxes, wire baskets and somewhere under this mess was a Rubbermaid tub.

Hmmm...what could be in here?

For those of you who don't know, I used to be a Stampin' Up! Demonstrator. In the box were old business forms, customer orders...and a 3" stack of invitations...postcards! Once I finished my happy dance I got busy with a foam brush and some gesso.


Getting started on the second layer of gesso...


2 days later, I was ready to start layering the paper. I knew that I wanted the postcards to  have texture, so I quietly lifted the Sunday comics from my son's room and began tearing the newspaper into strips, bits and pieces.


I randomly placed those strips, bits and pieces over the postcards and then adhered them using Claudine Hellmuth's Multi-medium (matte) and a foam brush. I didn't worry if the newspaper pieces were too long or hung over the sides. I would take care of those later.


To make sure that the pieces stayed flat, no bubbles or wrinkles, I used a mixing stick (it was an old stir stick from a box of hair color...did you think my color was real *wink* ) and used the flat edge, pressing from the center outwards to smooth it out. No worries if the multi-medium smooshed out!


When they were dried, I started tearing off the overhanging pieces of newspaper. I wanted the torn edges. At first I wasn't sure if I liked the look that I was getting...then I was sure I didn't like it! These postcards had a smooth shiny finish on them. When I started tearing off the newspaper, it started peeling off the gesso layer underneath and the shine was showing!

Should. Have. Sanded. First.

Lesson learned. So, I decided to wet the newspaper with water and peel, roll and rub off the original top layer. This technique leaves behind a very thin layer of newspaper and lots of yummy texture!


So there you have it...the base layer. I do have more to show you, but it's getting late and I want to keep my word regarding another post tonight! The next postcard post will be layering on the colors!

Inky hugs!

Angi