Showing posts with label Cards. Show all posts

Monday, September 15, 2014

House of Cards Colour Palette - Every Day Moments

Some days I feel as if I am having a lot of 'moments'...senior moments, life lesson moments, practice patience moments...do you know what I mean?!


These last couple of weeks have been hectic with school starting back up, fall sports, work, etc. Getting back into the routine of life with kids - school time.

Thank Goodness for the creative challenges! This month at the House of Cards challenge we have a colour palette!


This definitely says, "Autumn!" I pulled a few colours for this card: gray, red, the oranges...especially for the embossed, spritzed, lightly distressed background. I'm not sure I'm lovin' the ribbon. It feels like it needs a little something more. Keepin' it real here. This card may need a makeover.

Have you ever designed a card you just don't love?


The dragonfly is embossed and the buttons were punched from cork.

Not a lot of chit chat today. There's a lot on the to-do list! Grab a cuppa and take a look at the other designs for this challenge - you'll be inspired!

Inky hugs,
Angi

Playing along with the following challenges:
Deconstructed Sketch #168


Creative Moments #51 - ATG/Fall Colours
Little Red Wagon #254 - Cork (buttons)
SSS Wednesday Challenge - Make Your Own Background

Friday, August 29, 2014

Globecraft & Piccolo - Double Shot Coffee Cards

Hi, Everyone! Today I have a fun pair of cards using Globecraft & Piccolo's Accents and Embossing Enamels.


Most days I design singular projects, but sometimes I find a layout or design I really like and I make a set of cards that coordinate, but aren't exact duplicates...like these cards!


To make these cards, you'll need a few items from the G&P shop:

other supplies:
patterned papers: Amy Tangerine - Sketchbook
stamps: Stampin' Up! Perfect Blend, Gorgeous Grunge
cardstock: Stampin' Up! Melon Mambo, Wisteria Wonder, Whisper White
rhinestones
foam tape

I kept the basic design the same on both cards. I varied the patterned papers, cardstock colors, embossing enamels and accent placement.


The coffee cup on each card is embossed in Micro Black. I stamped the cup three times - once fully for the base, partially for each lid and partially for each wrap (on scraps of patterned paper). After fussy cutting, I adhered the wrap directly to the cup base and the lids were adhered using foam tape.


I had to include close ups of the accents...see how clean the edges are?! I love the natural color, but you can use markers, paint, 3D Gels, glitter glue...whatever you want to use to match them to your projects! (Sometimes there are tiny bits on the edges, but you can use an emery board/fine sand paper to smooth them away.)

The flourishes on the second card are 2 of the flourishes, one flipped over, glued close together. (These flourishes also make GORGEOUS hearts!)

Inky hugs,
Angi

Monday, August 11, 2014

House of Cards Sketch - Fairy Wish

I love a good sketch...you?


This month the challenge at House of Cards is this sketch:


I love the lines and how you can make this sketch CAS (Clean and Simple) or ramp it up and add lots of layers.

I decided on both...lots of little layers and simple lines. Using Lucky Wishes from A Day for Daisies (one of my most favorite digi stamp stores!) and a lacy punch and, of course, some gorgeous glitter this is my card...


Love the lacy layers and subtle texture! If this card wasn't already reserved for a special niece, I think it would be sitting on a shelf near my workbench; this fairy brings smiles.

Thanks for stopping by today. I hope you'll find time to stop by the House of Cards blog and see the other styles for this sketch.

Inky hugs,
Angi

Also playing along with these challenges:
Marker POP! #49 - Anything Goes (08/18)
Simon Says Wednesday Challenge - Make It Sparkle (08/13)
Chocolate, Coffee & Cards #71 - Fairies (08/22)

Friday, August 1, 2014

Globecraft & PIccolo - Summer Sympathy Card

 T.G.I.F! (Thank Goodness It's Friday!)


Seriously. I am thinking this with more enthusiasm than you can imagine! As you are sitting in front of your computer, in the comfort of your home reading this post, I am camping in North Carolina. Yep. You read that right! Outside with the bugs and the critters, humidity and heat...and by the time you read this I will be on day 4.

Can I get a little sympathy?

How about a card? *wink*

Here's what you'll need from the shop:
Enamel Powder Micro Gold
Enamel Powder Micro Black
Enamel Powder Adhesive Fluid
Steampunk Airship Accents (A100)

Other Supplies:
Stampin' Up! stamps:
background: Hardwood
flower silhouette: Serene Silhouettes
sentiment: Close As a Memory
Ink: Crumb Cake

crochet thread, natural

Stamp your background. Ink up your stamp with the Enamel Powder Adhesive and sprinkle on the Micro Gold. Heat. This is a beautiful, warm gold and the fine powder melts quickly.


Ink up your sentiment with the Enamel Powder Adhesive and sprinkle on the Micro Black. Heat. Love the texture and shine the enamel powder adds to a project!


Adhere the layers, tie on the crochet thread and add the Steampunk Airship Accent. The Accent just adds that little something that takes a card from nice to oooh!

Have a great weekend!

Inky hugs,
Angi

Friday, July 18, 2014

Globecraft & Piccolo - White Christmas in July x2

Welcome to the weekend!


I've seen a lot of "Christmas in July" projects lately and that got me thinking about designing CAS (Clean and Simple), but elegant cards. I love the white on white, but can't seem to get the hang of it...lol


I love how simple these cards are! Once you get the technique down, you can make a set of these in no time!

Here's what you'll need from the G&P shop:

Other supplies (linked items will take you to our sister store: Sweet Stamps):
snowflake stamp (such as THIS one)
foam tape/squares/circles
white cardstock

The first card is your standard ink up your stamp with the Enamel Powder Adhesive Fluid, sprinkle on the powder and heat. 

I found the easiest way to make sure my squares were centered was to adhere the bottom squares first, beginning with the center square. Then place 5 foam squares on the back of the embossed squares and adhere.


Another reason to love Ruby Red Slippers! It's the perfect Christmas Enamel Powder - look at the gold and all of the flecks of colors...simple gorgeous!

After I finished the first set of cards, I decided to make a 'negative' and try another technique. This one takes a little time and preparation, but it's so worth the WOW!  (Click here for the basic tutorial on how to stamp into the embossing enamel.)


A few tips: Dab the adhesive fluid on cardstock in an area large enough to cover your stamp and more. I did 2 layers of the enamel, then stamped. Be sure to press firmly and give it a minute to cool before pulling off the stamp. Don't forget to ink up the stamp with the Adhesive Fluid and then the Tuxedo Black before melting the powder, so you'll be ready to stamp!


That's it! If you have any questions or comments, be sure to post them below!

Inky hugs,
Angi

Friday, July 4, 2014

Globecraft & Piccolo - Patriotic Celebrate Card

Happy Birthday, USA!

For those of us in the USA (and Americans abroad), this weekend is a time to celebrate the Independence of the United States of America. With a few Globecraft & Piccolo Enamel Powders, we can make a quick patriotic card that shines!


Here's what you'll need from the G&P shop:

Other supplies:
white cardstock
red cardstock
Stampin' Up! sentiment (Feeling Sentimental)
Tim Holtz Tissue Tape (Marketplace)
foam tape

Isn't that shine of the Enamel and the Glastique gorgeous?!

1. Cut a strip of white cardstock 4.25"x1.5".  Ink it up with the Enamel Powder Adhesive. Sprinkle on Deep Blue Sky and heat. Let cool. Repeat.
2. Cut a panel of white cardstock 4.5"x4.25".  Using the dabber top, tap the Enamel Powder Adhesive along one of the short sides. Sprinkle on Pure Platinum and heat. Let cool. Repeat.
3. Dab the Enamel Powder Adhesive on the sentiment stamp. Stamp on the Pure Platinum panel. Sprinkle on Micro Black. Heat. Let cool.
4. Tear off a strip of tissue tape and adhere under sentiment.
5. Punch out heart (or use G&P heart Accent).  Apply Glastique. Let dry.
6. Adhere blue strip to card base. Adhere platinum panel using foam tape.
7. Adhere heart using Glastique.

That's it! Be sure to stop by this weekend for more Globecraft & Piccolo inspiration!

Inky hugs,
Angi

Sunday, June 22, 2014

Sentimental Sundays #212 - When I GROW up

Summer is here, but we haven't stopped around this house! Camping, kayaking, pool parties...I think I may need a vacation from the vacation already! lol


Well, it's time for another Sentimental Sundays Challenge...


This week's Sponsor is:
Polkadoodles Digi
Donating: 3 images. The same ones used by the DT.

This week's challenge is:

When I GROW up....


(plus a sentiment)

When I was just a little girl, I asked my mother what will I be? (I'm humming this as I type...)

I wanted to be all kinds of me:

Princess Me
Doctor Me
Mommy Me
and even
Ace Frehley's Girlfriend Me. Oh yes.

I used Drummer Troy on this card. Isn't he a cutie? I'm thinking a certain nephew of mine may be getting this card for his birthday. Shhh!


Got out the copics. Haven't colored in a long time! Hmmm...I could use some more practice. Better schedule copic coloring time after sit by the pool and read time. *wink*


Thanks for stopping by today! Hope to see you at the challenge!

Inky hugs,
Angi

Monday, June 16, 2014

Globecraft & Piccolo - Butterfly Delights and Faux Leather

I love butterflies...and leather...and sparkle! Today's project is a lovely mingle of the three.


Here's what you'll need from the shop:


Other Supplies:
Stampin' Up! cardstock: Whisper White, Pool Party
doily type stamp (Stampin' Up!)
Studio G sentiment stamp

Remember to use the Enamel Powder Adhesive Fluid to ink up your stamps and accents before adding the Enamel Powder(s).

Begin by stamping the doily stamp onto the Pool Party panel off center. Use the Micro White Enamel Powder. Let cool.

Here's where you'll be glad you read through the post before making this card! ;)

Open your jar of Aged White. Get out your tweezers.

Now...ink up the large butterfly and emboss using the Deep Blue Sky. While the blue is still warm, pinch a little of the Aged White using the tweezers and drop onto the blue wings. Heat again to melt. Let cool.


Love the blue with the speckles. So pretty!


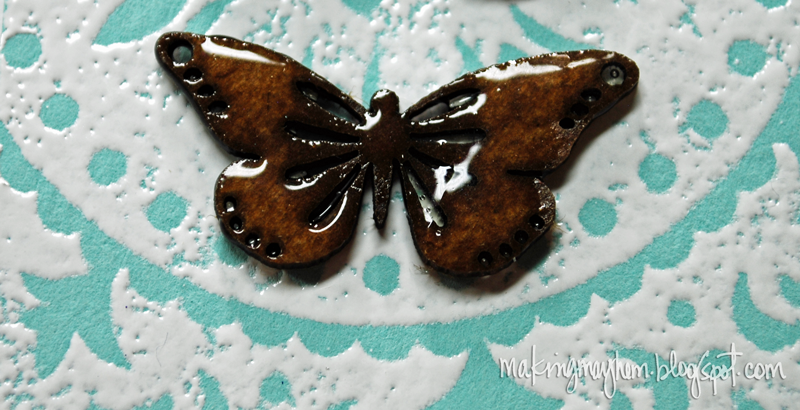
Now for the 'faux leather' butterflies. Absolutely love the plain accents covered in the Ultra Thick Clear! This butterfly has 3 uneven coats. Ink up with the Enamel Adhesive, dip the medium butterfly into a pile of the Ultra Thick Clear. Melt.

Do it again! Be amazed as the plain brown transforms into a bit of faux leather right before your eyes! 


Adhere the Pool Party panel using foam and then the butterflies using the Micro Glue Dots. Stamp your sentiment in the Tuxedo Black.

Done. Gorgeous!

Inky hugs,
Angi

Monday, June 9, 2014

Globecraft & Piccolo - Patriotic Blooms Thank You Card

Happy Monday, G&P friends!

Did you enjoy Sandy's card last week? My computer crashed and Sandy filled in for me with her fabulous card - Thanks, Sandy!

This week I have a card for you, too. Red, white and blue are not just a great Patriotic color combo (in the USA), but a wonderful color combo for any time, especially when you pair it with G&P Accents and Embossing Powders!


Here's what you'll need from the G&P shop:

Stacey's Stacking Flowers (LA106)
Embossing Powder Micro White
Embossing Powder Pure Platinum
Enamel Powder Adhesive Fluid
Bling on a Roll Silver
Glastique Gloss

Other Supplies:

Stampin' Up! Cardstock: Crumb Cake, Night of Navy, Soft Suede
Stampin' Up! Classic Ink: Pacific Point, Real Red, Whisper White
Brown Twine
Versamark Watermark Ink
Stampin' Up! Stamps: Banner Blast, Hardwood, sentiment stamp
Foam Adhesive


Start by inking up the flowers. I found the easiest way to color the flowers is to place the flowers facedown directly onto the ink pad and gently press. Repeat until depth of color desired is achieved. Let dry.

Cut card stock to size for each flower set and trim. Using the Versamark and stamps, stamp each banner. Using the Embossing Powder Adhesive Fluid emboss the edges of the banners with the Pure Platinum.

Stamp the background panel with the Hardwood stamp and Adhesive Fluid and then emboss with the Micro White.

Stamp the sentiment on a scrap of white card stock.


Using the photos as reference, adhere the background panel. Adhere the flower layers together using the Glastique and again to adhere the flowers to the banners. Use the foam under the 2 smaller banners. Finish layering the elements and then tie on the twine.

Finish the card with a few pieces of the Bling on a Roll in Silver.

That's it - beautiful thank you card for any occasion!

Be sure to stop by again tomorrow for another fabulous creation...

Inky hugs,
Angi

Friday, June 6, 2014

Sentimental Sundays #209 - Make It Fab-ric!

Happy Friday!

Did you miss me? It's so good to be able to write up a post...I just went through one of the worst weeks EVER. Lost my hard drive. Back up, my friends. Do it now. Wish I had...sigh. (more on this on another post...)

Anyhoo, I am back up to basics and trying to get back to creating and sharing. Have you been by the Sentimental Sundays challenge this week? I know I'm late, but here it is; you still have time to link up!


This week's Sentimental Sundays' Sponsor is:


This week's challenge is:

Make it Fab-ric!
(plus a sentiment)

"For this week's challenge we want to see how you use fabric on your projects. Do you die cut? Paint or stamp? Sew it directly on? We can't wait to see what you make!"

I love making mixed media cards. A variety of substrates, mediums, fibers...all good stuff!


After the computer mess I needed a little creative happiness, so this is what I came up with...rainbows and butterflies!


The magic's in the details - turning an ordinary piece of cardstock into something extraordinary! Details like vintage buttons, crochet thread, hole-y (isn't this a word without a hypen?! apparently spell check doesn't think so.) cork...


...and canvas. The sticky back kind. Started out with an ATC sized piece. Stamped 2 Memory Box Butterflies using Archival Ink in Jet Black, a little bit of water and Globecraft & Piccolo's 3D Enamel Gel in Daffodil and Turquoise. I left the body alone since I wasn't going to use it. Trimmed out the wings.


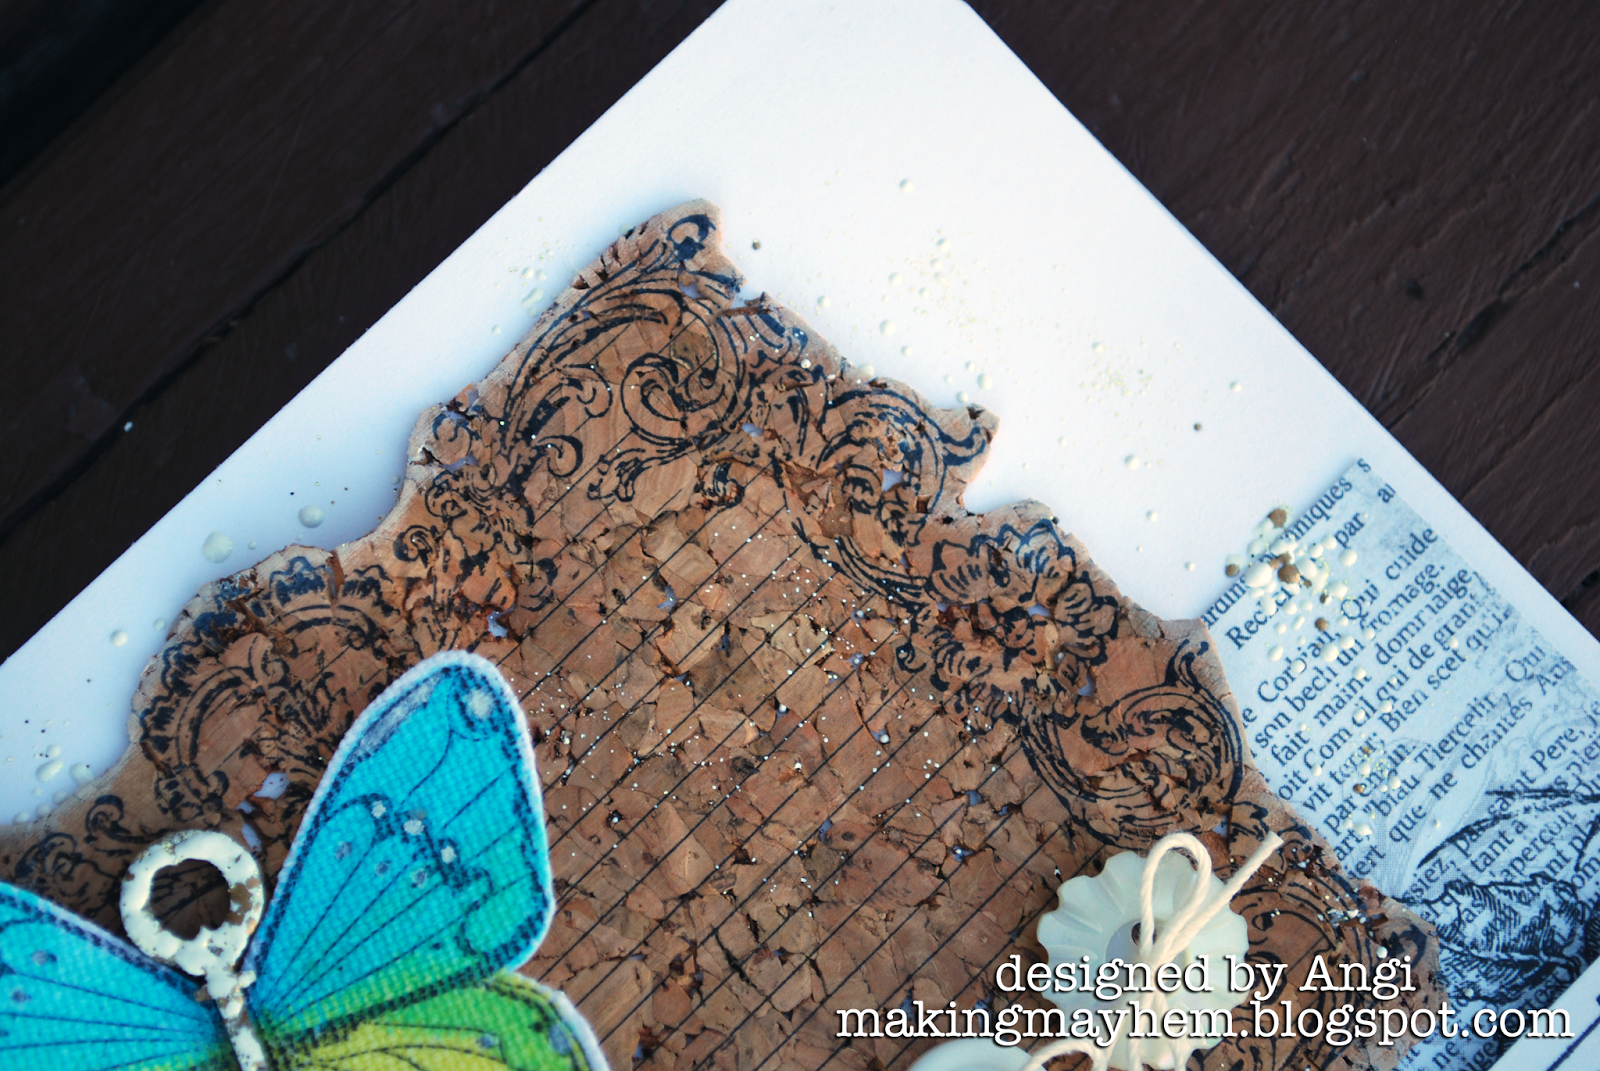
Here's a better look at this bit of lovely hole-y sticky back cork. Stamped with a (retired?) Stampin' Up! set: Notably Ornate with Archival Ink in Jet Black.


And the canvas butterfly. The key is Globecraft & Piccolo's set: Vintage Lock & Keys Charms (CA124) covered in Aged White Embossing Enamel. (just HAD to add some random sprinkles)

This was a fun card to make and already promised to someone! Working on the software upgrades and updates...when those are through there will be more "this is how I did it" videos! (this takes me back...way back to a certain song...lol)

Have a great weekend!

Inky hugs,
Angi

Playing along with the following challenges:
Mojo Monday 348 - Sketch (turned on its side)
Simon Says Stamp Monday Challenge - Magic (...it's in the details!)
Sparkle N Sprinkle - Anything Goes: loose glitter/embossing powder/flocking (embossing powder)
Sweet Stamps - Ribbons, Buttons, Bows (ribbons & buttons)
House of Cards - Photo Inspiration (cork, colors: green, yellow, blue, distressed metal: embossed key, white space...)

Monday, May 5, 2014

Globecraft & Piccolo - Hello Darling Embossed Card

Happy Monday!

It's almost time for the Great Lakes Mega Meet in Novi, Michigan (May 8-10)! Will you be attending? Globecraft & Piccolo will be there and will have a DIFFERENT make and take each day! Be sure to stop by the booth to play with our Embossing Enamels, 3D Gels, Piccolos and Globes!

Today I have a card to share with a few fun techniques for you to try. Click the picture and take a closer look at the awesome flower!


Here's what you'll need:

Globecraft & Piccolo Supplies:
Enamel Powder Adhesive Fluid (this should be a given! I do love G&P Enamels!)
Embossing Enamel Platinum
Embossing Enamel Poodle Skirt
Embossing Enamel Ultra Thick Clear
scrap piece of G&P bookboard (this can be any leftover piece)
3D Enamel Gel Coral Pearl
Glastique Glossy
Vintage Corner Flourishes (A157)

Other:
Background stamp (Stampin' Up!)
Flower (Prima)
Sentiment Stamp (Studio G)
Archival Ink Jet Black (Ranger - or any permanent black ink)
Melon Mambo Classic Ink (Stampin' Up!)
Vintage Photo Distress Ink (Ranger)
Rayon Seam Binding, white

Let's get started!
Dab the Adhesive Fluid over the flower petals. Coat with the Ultra Thick Clear Embossing Enamel. I found using a paintbrush works well to get adhesive into all the little nooks and crannies. Repeat until the petals are coated.

Love this.


What a difference! The coated flower looks like vintage plastic. What an easy way to get a different look from your flowers...


Take the Coral Pearl 3D Enamel Gel and scoop a bit out onto a craft mat. Add about the same amount of water (less if you want more color) and mix on the mat. Add the ribbon, smooshing (yes, that's a technical term!) it around until it's saturated. Place on a napkin. You can dry the ribbon with a heat tool (held far away) or a hair dryer. Be careful not to get too close & melt the ribbon!


Here's the ribbon wet:


The ribbon color lightens up when dry. Using the 3D Enamel Gels gives the limp seam binding some body and allows it to keep it's shape without making it difficult to work with.


The background was the usual dab on some adhesive, melt the powder.


Have you been keeping your scrap bits - the small and the large? I keep ALL of mine in a small container. (hint, hint...there may be some future ideas for those tiny pieces of craftiness!)


Edge the scrap piece with the adhesive and sprinkle on some Platinum and a little pinch of Poodle Skirt.

Finish up the card by layering the pieces and then using the Glasstique on top of the Accent pieces.


Whew! Did you try coating your flowers? I wonder what else needs a little updating in the studio... Thanks for stopping by today! See you here tomorrow for more inspiration!

Inky hugs,
Angi

Monday, April 7, 2014

Globecraft & Piccolo - Graffiti and Gears (aka the card that wanted to go steampunk)

Happy Monday, G&P Friends!


I have a girlie glam kind of card for you today! I started with the gears and thought I'd go steampunk (seems that Sandy and I were sharing some creative vibes!), but as you can see, this card went in a different direction...

Here are the supplies you'll need:

Globecraft & Piccolo

Background Stamp with words
Rose Red Seam Binding
Assorted flowers
Corrugated Cardboard
Picket Fence Distress Stain
Vintage Photo Distress Ink


The bling on a roll is so easy to use! It's faux bling that comes 'stringed', so you can cut it to size. It's so sparkly! You can use alcohol based markers, such as Copics to customize the bling to match your project and 1/8" Super Sticky Tape to adhere the bling.


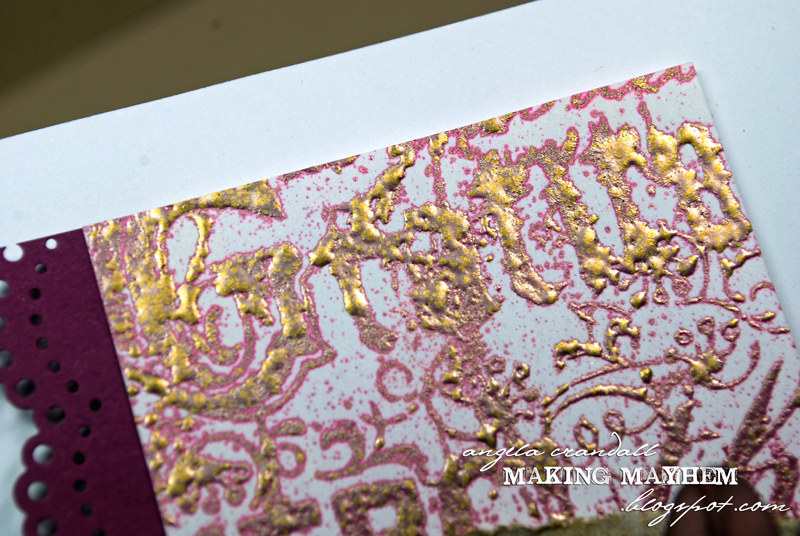
The Mardi Gras Embossing Enamel is such a lovely steampunk/vintage mix - burgundy and gold. The various sized particles really worked with this design giving it depth and texture right where it was needed!


The Accents are easy to color with 3D Enamel Gels or embossing enamels (or any other coloring medium for that matter!), but I decided to leave them natural.


And a bit of Embossing Enamel splatter using the Mardi Gras! See the spots of gold?

Thanks for stopping by today! See you tomorrow for a project designed by Tracy.

Inky hugs,
Angi